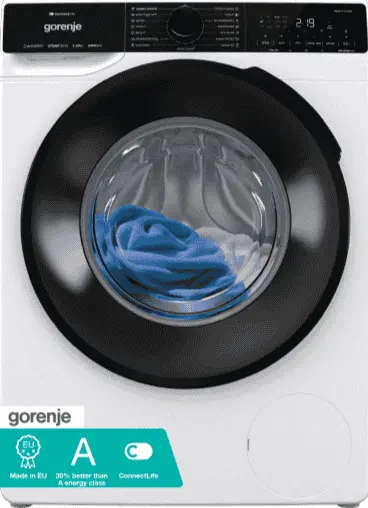
Gorenje Washing Machine: User Manual & Troubleshooting
User Manual
According to the Gorenje washing machine user manual, operating the appliance efficiently requires following a few essential steps. Start by ensuring the machine is properly plugged into a grounded power outlet for safe and stable operation. In the next step, gently pull out the detergent drawer and add the required amount of detergent and fabric softener—both liquid and powder types are supported.
The third step involves placing laundry evenly inside the drum to maintain balance during the spin cycle. The manual recommends selecting the appropriate wash program based on fabric type; Gorenje washing machines offer multiple fabric-friendly modes such as cotton, synthetics, wool, and quick wash. Once all settings are adjusted, press the start button to begin the cycle.
A built-in safety lock engages automatically, keeping the door securely closed throughout the wash. When the cycle ends, a soft beep indicates completion. For optimal long-term performance, the user manual advises wiping the drum and rubber gasket with a dry cloth after each use to prevent moisture buildup and maintain machine hygiene.
Gorenje Washing Machine Troubleshooting
Fault Codes and Efficient Problem Resolution
Gorenje washing machines are engineered with advanced sensors and automated systems that detect and report operational irregularities through error codes displayed on the control panel. Each code corresponds to a specific issue, from water flow problems to motor faults. Prompt recognition and accurate handling of these indicators ensure continued machine performance and prevent damage.
Common Gorenje Washer Errors and Solutions
E0 – Invalid Program Settings
Reinitialize the wash cycle using the correct settings. Persistent display of E0 indicates a potential software issue requiring a service technician inspection.
E1 – Temperature Sensor Failure
If the inlet water is unusually cold, the sensor may flag an error. Restart the cycle. Should the fault recur, internal diagnostics are likely needed.
E2 – Door Lock Malfunction
Temporarily remove the power supply, then reconnect it to allow the door lock system to reset automatically. Repeating this failure signifies a locking module issue.
E3 – Water Inlet Disruption
Inspect the inlet valve, filter, and supply hose for blockages or deformation. Also, verify water pressure falls between 0.5–8 bar. Resume the program. If the issue continues, professional maintenance is advised.
E4 / E5 / E12 – Motor Control Fault
Reboot the appliance and restart the selected cycle. Multiple instances suggest motor instability, demanding authorized service.
E6 – Water Heating System Error
Cycle interruption due to inconsistent water heating. Restart may clear the code temporarily, but recurring errors imply element failure.
E7 – Drainage Complication
Check the pump filter, outlet hose, and drainpipe for obstructions. Also, confirm proper hose height alignment as per installation guidelines. Resume the program post-verification.
Source: OLDBRINJE / Youtube
E9 – Leak Detected (Aqua Stop Activated)
Moisture has collected at the bottom section of the washing unit, likely triggering the leak detection system. Reboot the machine. Persistent detection points to an internal leak, needing immediate service intervention.
E10 – Water Level Sensor Fault
Unplug and replug the machine. If the problem returns, sensor calibration or replacement may be required.
E11 – Overflow Detected
In the event of excessive water filling with continuous flow, immediately shut off the water inlet to prevent overflow damage. Restart the cycle. Failure to resolve this may indicate a faulty valve or sensor.
E22 / E23 – Door Lock/Unlock Error
An inability to lock or unlock the door can be reset by powering off and restarting. Continued issues suggest an actuator malfunction.
E36 – Electronic Communication Failure
Power cycle the washing machine. If unresolved, internal electronic modules may be malfunctioning.
PF – Power Supply Disruption
The system detected a temporary loss of power. Resume the wash cycle using the Start/Pause button.
Additional System Alerts and Recommendations
cln – Self-Cleaning Cycle Reminder
After prolonged use, the control panel may display “cln” alongside “End.” This signals the need to initiate the Steril Tub program for internal hygiene maintenance.
Uneven Laundry Distribution
After a completed cycle, imbalance indicators may remain visible. Redistribute laundry manually and initiate the spin cycle again. Use the UKS (Stability Control System) to minimize vibration and noise caused by irregular loads.
Long-Term Performance
Proper usage and preventive care significantly reduce the likelihood of system errors. Here are essential practices to maintain your Gorenje washing machine in optimal condition:
If an issue cannot be resolved through standard troubleshooting steps, engage a certified Gorenje service technician. Unauthorized repairs or incorrect installation may void warranty coverage, resulting in additional repair costs.
General:

Brand | Gorenje |
Product | Washing Machine |
Language | English |
FileType | User Manual |
File Size | 800.00MB – (Pages – 60) |
